Open the editor
Select a deck in the Library and choose Open. The editor contains a slide rail, the slide canvas, and a task pane. The ribbon contains commands for the selected slide or object. The title bar provides Present and Start session.
Select a thumbnail to edit that slide. Select text, a picture, or another slide part to show its applicable controls. Choose an empty part of the slide to return to slide-level controls.
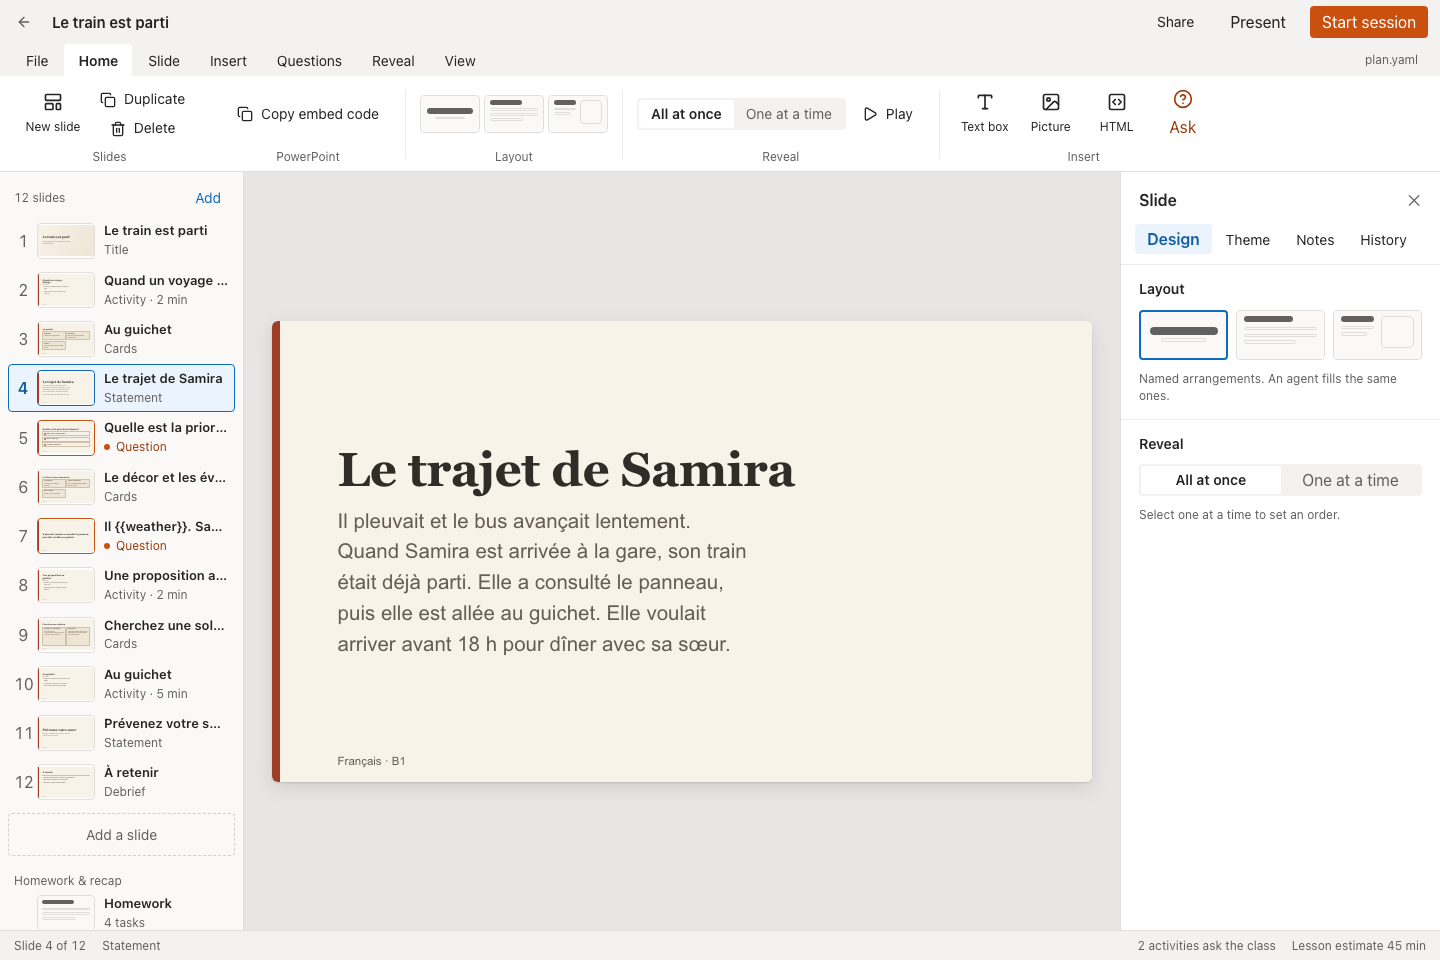
Select the slide in the left rail and edit its content and design on the same screen.
| Task-pane tab | Use |
|---|---|
| Design | Content, arrangement, timing, media, response mode, and reveal controls for the selection. |
| Theme | Deck colors, fonts, slide size, masters, and slide overrides. |
| Notes | Presenter notes and available learner-work insertion tools. |
| History | Saved versions and restoration. |
Write and format content
Select the text you want to edit. Replace its wording on the canvas or use the corresponding text field in the task pane. Use the formatting toolbar for the selected text’s font, size, emphasis, color, and alignment. Available controls follow the type of selected content.
Text boxes and pictures on a freeform slide can be dragged and resized using their frames. Structured slides arrange their parts through named layouts; select a Layout to change the arrangement.
Use the title in the top bar to rename the deck. Press Enter or move focus elsewhere to commit the name; Escape cancels.
Add and edit objects
On a slide that supports freeform objects, use Home → Text box or Insert → Text box. Enter the text on the canvas or in the selected object’s Text box field. Drag its frame to move it and use its handles to resize it. The task pane reports the box’s size and position as percentages of the slide.
Use Insert for Picture, HTML, Web page, PDF, and Reading objects. Select an existing object and choose Change… for a picture or Edit… for document and embedded content. Remove deletes that object. The enabled insert controls identify the kinds supported by the current slide.
For structured lists, select a card, step, term, answer, or other part and use its Add / Remove controls. Select the part’s text before applying formatting. Use the deck’s heading and body fonts under Theme to keep the whole presentation consistent.
Use the ribbon
| Tab | Main controls |
|---|---|
| File | Save a portable copy; Desktop adds local save and synchronization. |
| Home | New slide, duplicate/delete, layouts, timing, simple reveals, objects, questions, and PowerPoint embed code. |
| Slide | Individual slide types and breakout insertion. |
| Insert | Text, pictures, HTML, web pages, PDF, and reading objects. |
| Questions | Question dialog, gaps, matching, and classroom activities. |
| Reveal | Reveal mode, playback, Show all, and Edit order. |
| View | Start from here to rehearse the selected slide. |
The plan.yaml menu copies the command for reading the current deck through the CLI. Follow command-line setup before using it.
Save changes
Cloud editing saves a rolling draft after a short pause. The status shows Unsaved changes, Saving…, Saved, or a save error. Wait for Saved before closing the tab. A failed save retries automatically; if the error remains, keep the editor open, restore the connection, and make a further edit to retry.
Drafts preserve unfinished fields so you can return to them. Starting participation validates the content and saves a version first. Complete any question named in the readiness message before starting the session. A draft can be readable in the editor while its unfinished question still needs an answer or prompt.
The Save a copy and Copy embed code actions also save the current content before producing their output. A session already in progress uses the content captured when it started; edit the deck for a later session or use the live insertion tools for immediate additions.
Restore a version
- Open History in the task pane.
- Find the version you want by its number and saved date.
- Select Restore.
- Review the restored content in the editor.
Restored content becomes your working draft. Starting or exporting saves it through the normal versioned workflow. Later versions remain available in History.
Resolve a conflicting draft
If another client saved a newer version, the editor preserves your draft and displays two choices:
- Keep this draft: continue with the visible content, based on the latest saved version.
- Use saved version: replace the working text with the latest saved content.
Review the difference before choosing. Copy important text elsewhere if you need to combine overlapping changes manually. Starting participation waits until the conflict is resolved.
Review overflow
When content extends outside its intended area, select Review overflow. Choose an affected item to focus its existing editor. Shorten the text, reduce its formatting size, change the layout, enlarge its text box, or split the material across slides.
Long reading and homework documents have their own scrolling areas. Check both the slide preview and the document itself before presenting.
Open portable and prepared content
Open .openroom files in Desktop. For agent-authored YAML or JSON, use the connected agent or CLI workflow to validate and save the outline into a deck, then open that deck here to review the result.